最近有點時間可以回去玩 Xilinx 的板子,於是想要把 Vivado 升級到 2020.1 的版本,結果彈出歡迎視窗就安裝不了了 orz
來紀錄一下非圖形化的安裝方式。
問題紀錄
到 Xilinx - Downloads 下載 Vivado 2020.1 的 Xilinx Unified Installer 2020.1: Linux Self Extracting Web Installer 後,會得到以下檔案
Xilinx_Unified_2020.1_0602_1208_Lin64.bin
我們將其使用 chmod 獲得執行權限並執行它
coldnew@gentoo ~ $ chmod +x  Xilinx_Unified_2020.1_0602_1208_Lin64.bin
coldnew@gentoo ~ $ ./Xilinx_Unified_2020.1_0602_1208_Lin64.bin
然後因為我使用的是 Gentoo Linux, 不被支援是可以預期的狀態,此時安裝程式跳出了這個視窗
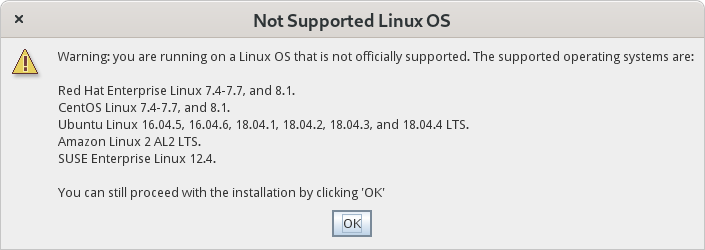
然後接下來點選 OK 後, console 就秀出以下錯誤,並且再也沒有新的安裝視窗出來了!!
coldnew@getnoo ~ $ ./Xilinx_Unified_2020.1_0602_1208_Lin64.bin
Verifying archive integrity... All good.
Uncompressing Xilinx Installer.......................................................................
Exception in thread "SPLASH_LOAD_MESSAGE" java.lang.IllegalStateException: no splash screen available
        at java.desktop/java.awt.SplashScreen.checkVisible(Unknown Source)
        at java.desktop/java.awt.SplashScreen.getBounds(Unknown Source)
        at java.desktop/java.awt.SplashScreen.getSize(Unknown Source)
        at com.xilinx.installer.gui.H.run(Unknown Source)
Exception in thread "main" java.lang.IllegalStateException: no splash screen available
        at java.desktop/java.awt.SplashScreen.checkVisible(Unknown Source)
        at java.desktop/java.awt.SplashScreen.close(Unknown Source)
        at com.xilinx.installer.gui.G.b(Unknown Source)
        at com.xilinx.installer.gui.InstallerGUI.G(Unknown Source)
        at com.xilinx.installer.gui.InstallerGUI.e(Unknown Source)
        at com.xilinx.installer.api.InstallerLauncher.main(Unknown Source)
好吧,誰叫你要用不被支援的 Linux Distro 呢,只好來使用指令方式安裝了
解壓縮到資料夾
從安裝程式的 help 可以看到我們可以先將安裝程式解壓縮到某個資料夾內
coldnew@getnoo ~ $ ./Xilinx_Unified_2020.1_0602_1208_Lin64.bin -h
Makeself version 2.1.5
 1) Getting help or info about ./Xilinx_Unified_2020.1_0602_1208_Lin64.bin :
  ./Xilinx_Unified_2020.1_0602_1208_Lin64.bin --help   Print this message
  ./Xilinx_Unified_2020.1_0602_1208_Lin64.bin --info   Print embedded info : title, default target directory, embedded script ...
  ./Xilinx_Unified_2020.1_0602_1208_Lin64.bin --lsm    Print embedded lsm entry (or no LSM)
  ./Xilinx_Unified_2020.1_0602_1208_Lin64.bin --list   Print the list of files in the archive
  ./Xilinx_Unified_2020.1_0602_1208_Lin64.bin --check  Checks integrity of the archive

 2) Running ./Xilinx_Unified_2020.1_0602_1208_Lin64.bin :
  ./Xilinx_Unified_2020.1_0602_1208_Lin64.bin [options] [--] [additional arguments to embedded script]
  with following options (in that order)
  --confirm             Ask before running embedded script
  --noexec              Do not run embedded script
  --keep                Do not erase target directory after running
                        the embedded script
  --nox11               Do not spawn an xterm
  --nochown             Do not give the extracted files to the current user
  --target NewDirectory Extract in NewDirectory
  --tar arg1 [arg2 ...] Access the contents of the archive through the tar command
  --                    Following arguments will be passed to the embedded script
因此我可以用以下方式將其解壓縮到 xilinx-installer 這個資料夾去
coldnew@getnoo ~ $ ./Xilinx_Unified_2020.1_0602_1208_Lin64.bin --target xilinx-installer --noexec
Creating directory installer
Verifying archive integrity... All good.
Uncompressing Xilinx Installer........................
進入到 xilinx-installer 資料夾,可以看到 xsetup 這個檔案,即是原本安裝程式解壓縮後會執行的檔案
coldnew@getnoo ~/xilinx-installer $ ls
bin  data  lib  tps  xsetup
手動安裝
下一步就是照原本 Vivado 安裝程式的流程,先進行使用者帳號驗證、選擇安裝程式、平台這樣一步一步的往下走
我們首先先進行帳號驗證,這是為了讓我們可以登入 Xilinx 網站順利下載缺失的安裝檔用
coldnew@getnoo ~/xilinx-installer $ ./xsetup -b AuthTokenGen
Running in batch mode...
Copyright (c) 1986-2020 Xilinx, Inc.  All rights reserved.

INFO : Internet connection validated, can connect to internet.
INFO : In order to generate the authentication token please provide your Xilinx account User ID and password.
User ID: your-user-id@gmail.com
Password:

INFO : Generating authentication token...
INFO : Saved authentication token file successfully, valid until 06/28/2020 07:25 下午
完成帳號驗證後,接下來就是產生設定檔,紀錄我們要安裝哪些東西,在這裡我選擇 Vitis 這樣它就會順便幫我安裝 Vivado 到系統
coldnew@getnoo ~/xilinx-installer $ ./xsetup -b ConfigGen
Running in batch mode...
Copyright (c) 1986-2020 Xilinx, Inc.  All rights reserved.

INFO : Log file location - /home/coldnew/.Xilinx/xinstall/xinstall_1592738839383.log
Select a Product from the list:
1. Vitis
2. Vivado
3. On-Premises Install for Cloud Deployments
4. BootGen
5. Lab Edition
6. Hardware Server
7. Documentation Navigator (Standalone)

Please choose: 1

INFO : Config file available at /home/coldnew/.Xilinx/install_config.txt. Please use -c <filename> to point to this install configuration.
注意到上面產生了一個設定檔案在 ${HOME}/.Xilinx/install_config.txt ,這邊設定檔請根據你自己的電腦位置修改,我們需要這個設定檔來完成下一步的安裝,如果你有需要的話也可以修改一下設定檔,移除不需要安裝的東西,設定檔的內容大致如下
#### Vitis Unified Software Platform Install Configuration ####
Edition=Vitis Unified Software Platform

Product=Vitis

# Path where Xilinx software will be installed.
Destination=/tools/Xilinx

# Choose the Products/Devices the you would like to install.
Modules=Zynq UltraScale+ MPSoC:1,DocNav:1,Virtex UltraScale+ HBM:1,Virtex UltraScale+ 58G:1,Virtex UltraScale+ 58G ES:0,Kintex-7:1,Virtex UltraScale+:1,Zynq-7000:1,Kintex UltraScale+:1,Model Composer:0,Spartan-7:1,Install devices for Alveo and Xilinx edge acceleration platforms:1,Kintex UltraScale:1,Virtex UltraScale:1,Engineering Sample Devices for Custom Platforms:0,Zynq UltraScale+ RFSoC:1,Versal AI Core Series ES1:0,System Generator for DSP:0,Versal Prime Series ES1:0,Artix-7:1,Virtex-7:1,Virtex UltraScale+ HBM ES:0,Zynq UltraScale+ RFSoC ES:0

# Choose the post install scripts you'd like to run as part of the finalization step. Please note that some of these scripts may require user interaction during runtime.
InstallOptions=

## Shortcuts and File associations ##
# Choose whether Start menu/Application menu shortcuts will be created or not.
CreateProgramGroupShortcuts=1

# Choose the name of the Start menu/Application menu shortcut. This setting will be ignored if you choose NOT to create shortcuts.
ProgramGroupFolder=Xilinx Design Tools

# Choose whether shortcuts will be created for All users or just the Current user. Shortcuts can be created for all users only if you run the installer as administrator.
CreateShortcutsForAllUsers=0

# Choose whether shortcuts will be created on the desktop or not.
CreateDesktopShortcuts=1

# Choose whether file associations will be created or not.
CreateFileAssociation=1

# Choose whether disk usage will be optimized (reduced) after installation
EnableDiskUsageOptimization=1
接下來就是讓它進行安裝囉,這邊我將我的檔案裝到 /opt/Xilinx 去
coldnew@gentoo ~/xilinx-installer $ ./xsetup --batch Install --agree XilinxEULA,3rdPartyEULA,WebTalkTerms --location /opt/Xilinx --config "${HOME}/.Xilinx/install_config.txt"
Running in batch mode...
Copyright (c) 1986-2020 Xilinx, Inc.  All rights reserved.

INFO : Log file location - /home/coldnew/.Xilinx/xinstall/xinstall_1592861224080.log
INFO : Internet connection validated, can connect to internet.
INFO : Authenticated user coldnew.tw@gmail.com successfully.
INFO : Installing Edition: Vitis Unified Software Platform
INFO : Installation directory is /opt/Xilinx/

Downloading files (23.70 GB / 30.20 GB) 3 h and 49 m(s) left at 592 KB/sec. /
Downloading files (30.20 GB / 30.20 GB) <1 minute left at 540 KB/sec. (Done)
It took 3 h and 36 m(s) to download files.
Installing files, 99% completed. (Done)
It took 32 minutes to install files.

INFO : Log file is copied to : /opt/Xilinx/.xinstall/Vitis_2020.1/xinstall.log
INFO : Installation completed successfully.For the platforms: please visit xilinx.com and review the "Getting Started Guide" UG1301
剩下就是等待檔案下載安裝完成就 ok 囉~
強制圖形化安裝的解法
後來在 Installing Vivado 2020.1 on Linux Mint 19 這篇文章看到另外的解決方案,可以讓安裝程式順利進入到圖形界面。
他是怎做的呢? 實際上安裝程式會去抓你系統的 /etc/os-release 和 /etc/lsb-release 這兩樣資訊,這點可以從 strace 來查證
coldnew@getnoo ~/xilinx-installer $ strace -f ./xsetup

[pid 3743535] openat(AT_FDCWD, "/etc/lsb-release", O_RDONLY) = 3
[pid 3743644] openat(AT_FDCWD, "/etc/os-release", O_RDONLY <unfinished ...>
所以呀,我們就暫時把 /etc/os-release 替換成這樣
NAME="Ubuntu"
VERSION="16.04.6 LTS (Xenial Xerus)"
ID=ubuntu
ID_LIKE=debian
PRETTY_NAME="Ubuntu 16.04.6 LTS"
VERSION_ID="16.04"
HOME_URL="http://www.ubuntu.com/"
SUPPORT_URL="http://help.ubuntu.com/"
BUG_REPORT_URL="http://bugs.launchpad.net/ubuntu/"
VERSION_CODENAME=xenial
UBUNTU_CODENAME=xenial
然後再把 /etc/lsb-release 換成這樣
DISTRIB_ID=Ubuntu
DISTRIB_RELEASE=16.04
DISTRIB_CODENAME=xenial
DISTRIB_DESCRIPTION="Ubuntu 16.04.6 LTS"
也就是偽裝成 Ubuntu 16.04 的樣子,這樣圖形版的安裝程式就可以跑啦 !!!!
安裝 USB driver (udev rules)
因為我們有用 JTAG 進行開發,所以安裝完成後,別忘記手動安裝需要用到的 udev rules。
假設這邊將 Vivado 安裝到以下路徑
VIVADO_INSTALL_DIR=/opt/Xilinx/Vivado/2020.1
則進入到 ${VIVADO_INSTALL_DIR}/data/xicom/cable_drivers/lin64/install_script/install_drivers 這邊,裡面有個 install_drivers 腳本可以執行,用 root 權限執行後就會把需要的 UDEV rules 安裝到系統去。
export VIVADO_INSTALL_DIR=/opt/Xilinx/Vivado/2020.1

cd ${VIVADO_INSTALL_DIR}/data/xicom/cable_drivers/lin64/install_script/install_drivers
sudo ./install_drivers